
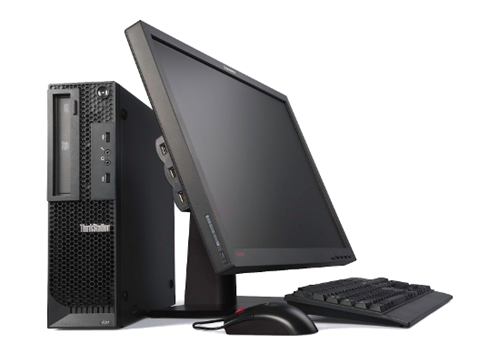
For the past 2 weeks I have been performing modal analysis tests and comparison studies with Simulation Mechanical, Inventor, and Sim 360 on the Lenovo E31 test platform. Because of Sim 360, I cannot discuss all the results, however I can relate some flat plate analysis topics that I was engaged in, which seemed to take on a life of their own. Today I’d like to go over some details related to sheet metal prediction using thin layered solid mesh and the midplane plate algorithm, as well as some problems to avoid.
Thin Layered Solid Mesh Considerations
When trying to predict the behavior of flat sheet components, very careful preparation and considerations need to be made. The accuracy of the results depends greatly upon a few factors, 2 of which are:
- The ratio of the cross section thickness of the sheet to the overall length
- The method used to form the elements of the model
 When using a solid mesh methodology, often with brick or wedge elements, it is absolutely crucial to ensure that at least 3 layers of elements exists in the plate’s cross-sectional mesh. Without that, the bending forces inside the material cannot be evaluated, and results are likely to be inaccurate and void. Using automatic mesh routines typically utilize a factor of the overall length in order to generate the element size, and as a result, usually only create a single layer through the sheet thickness. Setting the mesh factor small enough to create the layers results in a tiny mesh size with potentially millions of elements, that increase the calculation time exponentially, but will not necessarily increase the accuracy along the length of the component.

Simulation Mechanical offers a nice option to formulate the sheet mesh as a thin layer of brick and wedge elements (Solid Mesh Options) by calculating the smallest thickness across the component (the sheet thickness) and dividing it into a user defined number of layers. In sheets with a consistent thickness, it works beautifully and quite fast. The length of the elements along the length of the component is controlled separately using the users input in the Surface Mesh options.
Midplane Meshing
 Midplane meshing is a brilliant method of creating a mesh of plate elements that exists along the centerline of the sheet. Since there is only a single layer of elements, extremely fast calculations are possible. The key to this process is the plate solving algorithm that looks at the material properties and applies them to the mathematics designed specifically for the behaviors of sheet and flat plate components. Which option is better to use?
Thin Wedge and Midplane
The point at which the benefits of one override the other is vague, however once you pass 10 or 15:1, the midplane option will speed the mesher and solver up tremendously. The following basic guidelines can get you started. Continued practice with variations in cross section ratio and physical testing will establish some confidence of what can be expected.
Length / Thickness
<10 use a solid methodology
10 – 15 Use thin layer of wedges or midplane
>15 use midplane whenever possible

In numerous comparisons using Simulation Mechanical 2013 and 2014, consistently similar results were found between thin layered mesh and the midplane method. Some test examples are as follows:
- [24:1] 6 in x 12 in x 0.5 in 2024-T3 – Mechanical Event Simulation (MES) with bending stress beyond elastic range of material.
- similar results
- [96:1] 6 in x 12 in x 0.125 in 6061-T6 – Mechanical Event Simulation (MES) with bending stress beyond elastic range of material

- similarity of von Mises strain results = 0.9826
- Runtime: thin layered 12 min 4 sec; midplane 5 min 30 sec
- [666:1] 0.3m x 2m x 0.003m A36 – Static stress with gravity load

- similarity of displacement results = 0.9981
- [5000:1} 1m x 15m x 0.003m A36 Steel – Static Stress with gravity load

- similarity of displacement = 0.9872; similarity of von Mises strain = 0.8526. While the displacements were somewhat consistent between thin layered and midplane meshing using the Veubeke formulation, neither model delivered reasonable results due to the very large ratio and limited constraint in the model. Large, thin sheet performance becomes questionable once the TDM (too damn long) threshold is reached. Other element formulations did not produce reasonable results.


Careful Setup to Avoid Poor Results
The problem with thin sheet modeling is that the larger the length / thickness ratio becomes, the more unstable the results become once you reach that TDM threshold. Additionally the calculation time can become quite long.
The aforesaid studies found very similar results provided the setup could be duplicated precisely. This included not only element types, but also constraints. One problem was discovered once the z axis rotation was freed. This caused the end constraints to act as hinges instead of a welded structure. Since midplane in the setup has no thickness, the edge of the sheet hinges with no limitation. The thin layered solid has a thickness and those elements are not permitted to translate in any plane. The edge selected is permitted to rotate, provided the adjacent elements do not translate, resulting in no difference from the welded, fully constrained edge.

These are the results where the issue became evident:
- Midplane and Solid (Fixed edge) – 42mm deflection
- Solid thin layers (hinged edge) – 42mm deflection
- Midplane (hinged edge) – 107mm deflection

In the examples above both were constrained on edge with no restriction on rotation. The solver saw the limitations over the thickness of the solid part, and continued to evaluate the constraint as fixed.
While we could develop some geometry for the solid that would allow us to duplicate the midplane’s freedom, it would take additional time and creativity. The moral of this story is watch your setup very carefully.
Element Formation and Solvers (more to come)
This topic will be reviewed in more detail following this article, but for the sake of mentioning it here, Element Formation is a critical factor in the setup. Element behavior is subject to your understanding of approximately how the component will react to forces. If extensive warpage will be present in the reaction, then the default Element Formation option (Veubeke) should not be used. Very often sheet metals are expected to experience warpage, and makes this an important consideration.
The Iterative (AMG) solver is designed to handle thin wall and plate elements where large number of degrees of freedom and involved. The automatic selection should select this option when plate elements are involved, however verify that with the results log file.
Conclusion
In most cases the midplane solution permits more consistent, accurate results in thin sheet and plate materials, especially where bending forces will be experienced. Midplane also give the user the ability to use a finer mesh as the solver doesn’t need to plow through heavy solid mesh calculations. Just watch your setup carefully.
When MES is involved, midplane is the champ, and significantly improves the solve time with accurate results. The 4 core Lenovo E31 test platform being used handles things fairly well, but when MES are complex, midplane mesh can turn hours into minutes.

