
Solidworks arguably has the largest install base of the mid-range CAD products globally. Naturally this translates to a lot of Building Products Manufacturers also being Solidworks users. As BIM adoption accelerates at a rapid rate of knots, with large swathes of companies using products like Autodesk Revit and ArchiCAD, the pressure to provide high quality BIM content is piling up for Solidworks users around the world. However, although the simplification tools in Solidworks are extremely capable, and certainly adequate, there are limitations when it comes to Solidworks BIM export formats and embedded data (the I part of BIM). In this post I will highlight the most compatible workflows within Solidworks, but also show how easy it is to create poor BIM content.
The Base Dataset
The most likely scenario when starting to create BIM content, is having to do so from a completed and highly detail design. Ideally you would plan for BIM content creation during the preliminary stages of fleshing out your model in Solidworks. There is no reason why you couldn’t use the simplified geometry required for BIM content, to drive the complex forms and detail of your product. The benefits are twofold, you end up with a stable model driven by simple envelopes and instant access to a simple model to create Solidworks BIM content with.

For the benefit of our readers. I’ve kindly been provided permission to use a fully detailed model of a Methven Aio Basin Mixer, skillfully modeled in Solidworks 2014. Methven make beautiful products, and I can say that, given my wife and I ended up choosing to use the Methven Kiri range of products throughout our house, long before I had the opportunity to work on this Solidworks BIM project with them.
Organization & Suppression

As with most high end 3D CAD products, Solidworks allows users to organize components within the assembly environment into folders within its browser. This provides a great opportunity to visually sort components into two folders, internal and external components. In doing so you can quickly toggle the visibility of components in between the two folders, making sure you end up with all the relevant Solidworks ‘BIM’ components sitting in the external components folder, allowing you to suppress all the internal components in one hit.
Simplify

This command is a cheeky little number, and like the Remove Details command in Autodesk Inventor, it relies on the features you want it to remove being native to the CAD application. So essentially this means you can’t effectively use the Simplify command with 3rd party models you have imported.
The Simplify command requires you to select which features you want to remove, a simplification factor, and if you want the simplification to be feature or volume based. A nice touch is the ability to ignore removal of features which affect assembly mates. In this case I’ve used all the default options, then after clicking the Find Now button, I enabled the All checkbox, but you can explicitly highlight which features you want to keep and which ones you want to suppress. Highlighted features will be suppressed once the Suppress button is clicked. You can also create a configuration with this tool if the situation suits. As you can see from the image below the result can be quite beneficial, but retain the overall appearance of the component.
Defeature
 Powerful, but a tad unreliable, the Defeature command has 4 stages. Component removal allows you to automate the removal of all internal components, manually select components to remove but also specify exceptions to any other rules set during this step. Stage 2 allows you to maintain some movement between components by creating rigid groups. The third stage provides the ability to choose which features to keep, either explicitly or via some auto select tools and filters. The final stage presents itself after the Defeature command processes all the selections so far, two windows appear, with the original model on the left and a defeatured preview on the right.
Throughout the process you have access to a Section View panel in the Property Manager. This is particularly helpful during the final and 4th stage of defeaturing. You can use it to check to see how much of the model, if any has been defeatured as you would expect. Luckily this stage gives you the opportunity to select additional faces, features, bodies or components to remove. Select any face and a mini toolbar pops up near your cursor, then you can choose how to expand your selection beyond the face you chose. I find this quite an effective method of refining what you need, my only complaint it deciphering what you have selected. This is a unique issue to the Defeature command, but rather a global issue with Solidworks once you have a lot of entities selected. To be fair the development team have eased this issue a bit, by allowing the user to expand the selection box in the Property Manager with the 2016 release.
 Clicking through to the final page of this process, you can decide what you want to do with the model. In the context of this article, the first option makes the most sense. You can choose to Link the resulting model back to your original assembly if you want. Which could prove to be particularly helpful to building product manufacturers.
Repair, Patch & Fill
 Frustratingly in this case I wasn’t able to get the Defeature tool to fill in all of the voids, even after selecting all the features in this area of the model (at least I’m pretty sure I did… tough to tell). So if you come across this situation, you an take advantage of Solidworks modelling tools to extrude a boss, then make use of the copy body, boolean subtract and add commands. Ultimately this will create a new body you can use to fill any additional voids. In this case I chose to take it a step further, and create simplified geometry of the clamps as well.
Export Options
So this is where the good BIM, bad BIM play comes in. There are three effective ways of getting model geometry and metadata out of Solidworks and into Revit or Archicad. I’ll briefly cover each of them, as well as showing the geometric results in Revit & ArchiCAD, as well as the resulting file sizes.
Solidworks BIM Export (Export to AEC)

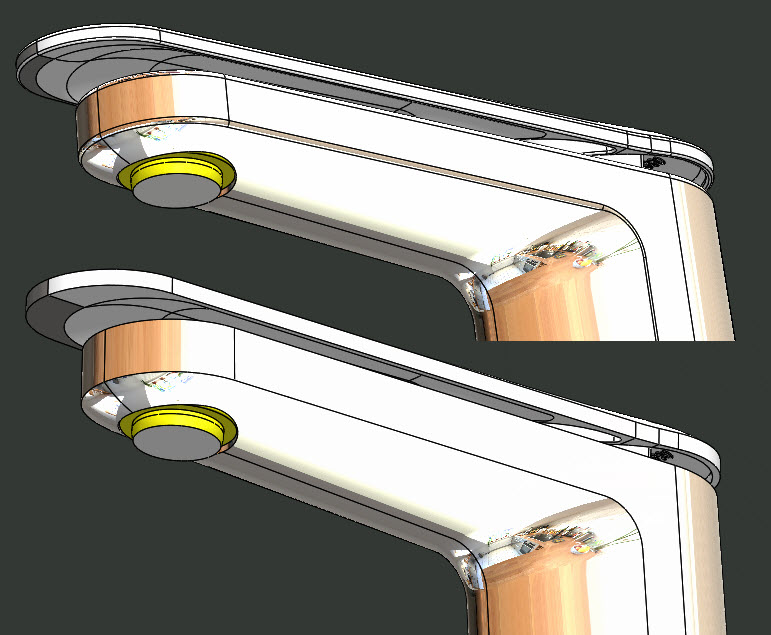
This is more of a workflow tool than anything else, whereby it brings together a number of tools available elsewhere in Solidworks. It starts with a request to define the type of BIM component it is and it’s orientation. I believe this is the only location in Solidworks where this vital part of BIM content creation can be achieved. After defining the ‘Host’ (floor, wall or ceiling), you are required to define a plane and an origin about which your BIM component will be attached within its destination model in the future. You can choose to Flip the Normal of the plane you select, but there is no way of telling which was is correct until you have imported it into the destination model.
On the next page you have to specify the level of detail you want to get achieve in your target model. Selecting either High, Medium or Low will pre-configure the Defeature command, allowing you to skip all the questions it asks of you, otherwise selecting Custom will take you through the full Defeature process. If you take the quick option, there aren’t any view section tools available so you can quickly check if you are being delivered the result you need. The final stage then allows you to export the result as a SAT file, I find it quite bizarre that IFC (and it’s Class definition toolset) wasn’t included as an option here.
This is my preferred option of the three for exporting you Solidworks BIM model. It gives you some BIM metadata and very clean geometry for the destination BIM based CAD system. SAT files are definitely the best option to get model data from Solidworks to Autodesk Revit.
IFC Export

IFC is an extremely popular neutral file format in the BIM world. It’s certainly highly compatible with ArchiCAD and can contain rich metadata and various geometry options. It’s great news then, that IFC export has had a stealthy upgrade between Solidworks 2015 & 2016. Previously you could only export using IFC 2×3 with OmniClass classification, but you also had to set your document’s image quality to a suitable level, since quite bizarrely that drives the quality of the IFC output. 2016 delivers the option to export using the IFC 4 format, then additional improvements deliver the option of using UniClass2 classifications, as well as defining if you want Solidworks to use BREP, BREP and Tessellation or Tessellation export methods. However, you do still need to set the Image Quality in your document to determine the output resolution of the IFC file, why this can’t be specified during the export process is beyond me.
Based on my tests, exporting to IFC is an acceptable way of creating good Solidworks BIM content for ArchiCAD but a pretty terrible one for Revit. However, ArchiCAD 19 currently doesn’t support the IFC 4 file format, you will have to continue using IFC 2×3 for now. Given that the Solidworks IFC imported into Archicad delivers clean geometry, whereas in Revit the result is frankly quite disgusting, I’d say Autodesk have really dropped the ball when it comes to importing IFC files into Revit.
SAT Export

It doesn’t get any simpler than this. If you’ve followed the steps in this post and created a nice, clean and simple model for export. Then all you need to do is Save As your model and select ACIS as the file type, and save it out. The downside is you don’t get any actual ‘BIM’ metadata exported with the model, like you do when you use either Export to AEC or IFC Export.
Conclusion
Solidworks certainly has some decent tools when it comes to simplifying models of its own creation, albeit with some issues. Automating model simplification will always be an extremely tricky prospect with history based parametric modellers. The second part of the Solidwork BIM creation story isn’t about model geometry, its about Information. Although Solidworks does provide some tools to deliver BIM industry standard meta data, they do fall short. It’s at this point the reality sets in for Solidworks, it has some way to catch up before it can produce the same quality BIM content for Building Product Manufacturers as some of its competitors can. Nevertheless, I hope I’ve shown that with a bit of preparation and effort, you can indeed create good quality Solidworks BIM content.


