
SolidWorks Costing
I was using the help in SolidWorks, researching advanced options of a feature, when I stumbled upon the SolidWorks Costing section…. and thought “hmmmmm, this seems interesting“. I had the basic understanding of what it was, but never spent any time with it. Then I thought “there really is no time like the present!”
The help is very extensive on the SolidWorks Costing feature but very easy to read and follow. The only information missing, which is important to note, is that the Costing module is only available with Solidworks Premium and Solidworks Professional.
“The tool helps designers make decisions based on the cost to manufacture and helps manufacturers create quotes for customers. Whenever you change a design, you can see the new, updated cost immediately, along with a detailed cost breakdown. Additionally, you can generate automatic cost reports.”
This tool is intended for designers and manufacturers. Designers gain insight into what parts cost to manufacturer and can explore different methods of manufacture. The cost estimates update in real time as the model changes, meaning you can see the impact on the cost immediately. For manufacturers, real-time costs are ideal for quoting.The SolidWorks Costing tool supports many methods including sheet metal, machined operations, cast parts, plastic molded, 3D printing, assemblies, and weldments.
This tool is template based and the templates are easily modified. Once your templates are defined, it really takes little time to get a cost. Remember though, the cost is only as accurate as the information you define in your templates.
Getting Started
Initiate the Costing feature from the Evaluate tab of the CommandManager. This launches the Costing Options dialog, used to set the costing defaults and override the applied template with settings specific for this file.

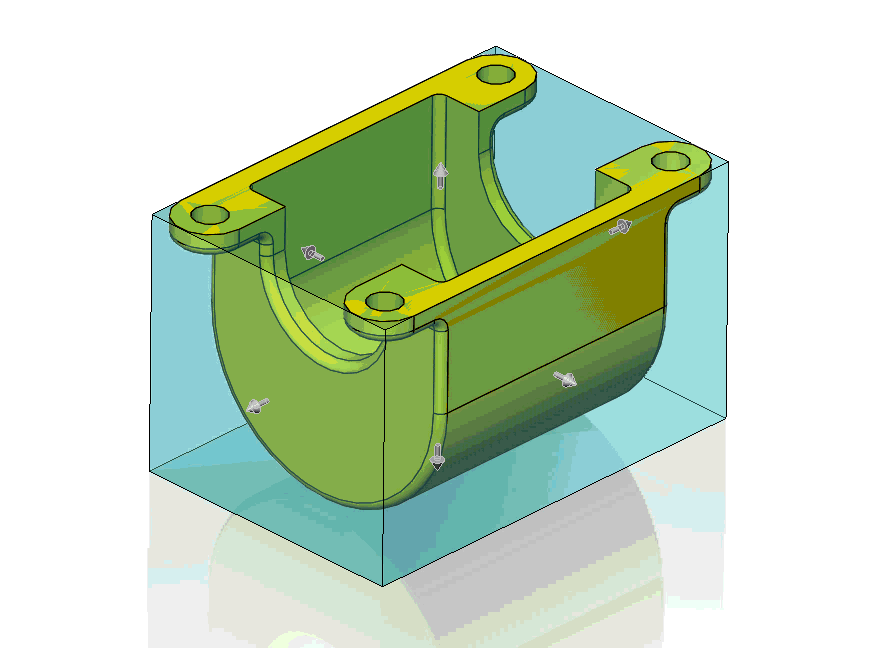
In this example, I select a General body type of machining, set the material type, the stock material type, as well as the Quantity manufactured

With that the Costing Task Pane populates and I can adjust the stock size with the onscreen manipulators (or specify exact values within the Task Pane).
To relaunch the Costing Options dialog click the button in the upper left corner of the Task Pane

Getting the Estimate
The green section identifies the part is ready to be estimated. Although set in the Options dialog, the Method, Template, and Quantity can be adjusted from within the pane. I’ve already used the Stock Body section to adjust the size of the stock material, so I collapsed it so I can see all sections without scrolling.

If you’ve already assigned a material to the part, it will be automatically set within the costing area. If not, select the desired material class and name. Click Set Material to assign the selected material as the parts material properties. The material cost is set by the applied template, but it can be overridden (it will show as yellow when overridden).
Shop rate sets a cost per hour regardless of what machine is used. This is valuable when you only have one shop rate for all manufacturing or your vendor supplies only their shop rate, not the rates for individual processes.
Once satisfied with the settings click Begin Cost Estimation. After the calculation completes, the Estimated Cost Per Part panel appears. This cost automatically updates with any changes you make to the component. The first cost always shows in red as its always 100% more than zero (0).
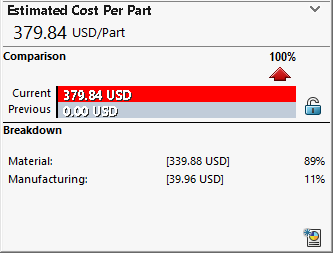
Click Set Baseline to set the current cost as the baseline. This means future design changes (estimates) are compared to the baseline and colour coded for easy identification. Here I make a quick change, adjusting the material to Copper, this automatically adjusts the material cost, making the component more expensive to manufacture.

Cost as a Property
Now that an estimate has been determined the cost information can be added as a file property. As a file property, it is available for the bill of materials, drawing title blocks, and other downstream applications.

See it in Action!
Reports
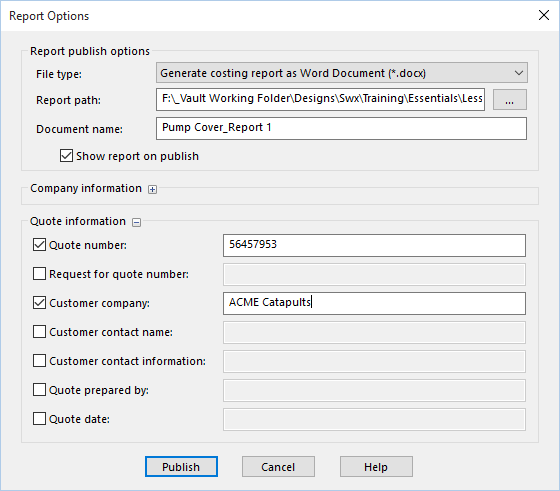
The button in the lower right-corner of the Costing Task Pane launches the Report Options dialog. Configure the settings and click Publish to generate the report.
In Summary
There’s really two things to take away from this post…
- Don’t forget about the help, it really can be helpful
- Once your templates are configured, SolidWorks Costing provides almost instant estimates for manufacturing your parts… why not make this a step in your standard procedures?
Feature Image: Health Care Costs by 401(K) 2012


