
Earlier this year I applied for the Fusion 360 beta and became one of the many beta testers for the multi-tool cloud-based CAD software. Since it’s now available for everyone, I thought I could share my thoughts and workflows concerning Fusion 360.
In this three-part post I will guide you through the process of creating a concept of a product – from a vague image in your head to finished renders, using Autodesk Fusion 360 and Autodesk VRED.
Part 1: Developing the shape.
It all starts with a rough idea. When you have an idea it is fairly easy to start. All you have to do is start developing the basic shape of the object and add details as you go.
Personally, I prefer to start with a couple of sketches. By using the sketch tool in Fusion 360, I laid a couple of guidelines in the top and side views. Simply use the arc, spline or line tool to draw the guidelines for further development. These lines will be very useful once the actual modelling starts.

After the lines are laid, we can then go ahead and start the modelling process. I usually start with a box in the “Sculpt” environment.
Note: if the model you’re creating is going to be symmetrical, you might want to have an additional edge segment at the centre of the box which divides it into two sides, as in the image below. It will become handy once you need to make both sides identical.

Modelling with Autodesk Fusion 360 is easy: click on Edit Shape command, select the Face selection filter and then use the manipulation axis + Alt button to extrude and distort the box. Repeat until you have a big blob that somewhat matches the guidelines.

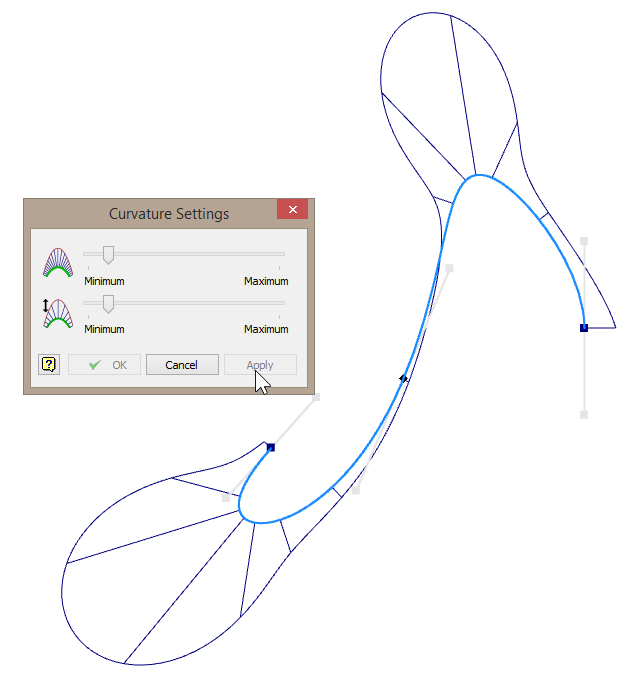
Now this is the part where you should start adding the definition to the model. This can be done by inserting additional edges or by using the Crease Edge command.

Toggle between smooth and low-poly modes to really understand what is going on with the shape; it’s a good way to understand how poly and TSpline modelling works, as well as to tweak and fine-tune your model.

Keep adding creases and edges to reach the desired level of detail. Once the shape is in its final stages, we can then proceed to the next step by converting it into a solid object; for assembly and further detailing. More about this in my next post of the series. Stay tuned!
[subscribe2]

