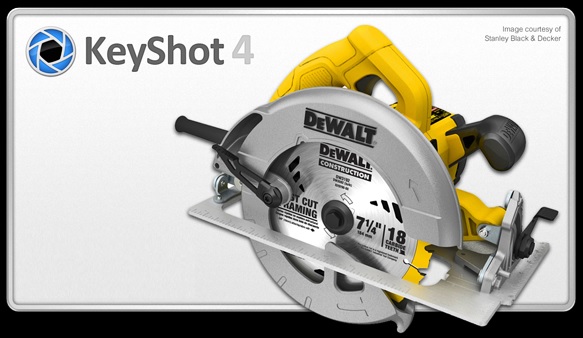
KeyShot 4 is a 3D rendering and animation program created to make life easier for designers and visualization makers. It is a stand-alone rendering system utilizing computer’s CPUs to map photons and unbiased sampling techniques which lead to mathematically correct, photo realistic renderings.
Supports:
Macs and PCs with multiple core processors. KeyShot is friendly with most modern modelling software – Inventor, SolidWorks, Pro/ENGINEER, Rhino, SketchUp, Modo, Maya, 3ds Max and many more. File types supported out-of-the-box (More plugins are available on their website):
| Alias (*.wire) | SolidEdge Part (*.par) |
| AutoCAD (*.dwg *.dxf) | SolidEdge Assembly (*.asm) |
| Catia (*.cgr *.catpart *.catproduct *.catdrawing) | SolidEdge Sheet Metal (*.psm) |
| Inventor Part (*.ipt) | SolidWorks Part (*.prt *.sldprt) |
| Inventor Assembly (*.iam) | SolidWorks Assembly (*.asm *.sldasm) |
| KeyShot (*.bip) | Parasolid (*x_t) |
| KeyShot Package (*.ksp) | Unigraphics NX (*.prt) |
| Maya (*.ma *.mb) | JT (*.jt) |
| Creo Part (*prt *.prt.*) | 3DS (*.3ds) |
| Creo Assembly (*.asm *.asm.*) | FBX (*.fbx) |
| Pro/E Part (*prt *.prt.*) | IGES (*.igs *.iges) |
| Pro/E Assembly (*.asm *.asm.*) | OBJ (*.obj) |
| Rhino (*.3dm) | STEP AP203/214 (*.stp *.step) |
| SketchUp (*.skp) | Collada (*.dae) |
| 3dxml (*.3dxml) |
Review:

The first time I ran KeyShot I was surprised by its lack of interface. “Well that can’t be good” – I thought. I was used to seeing complicated rendering system interfaces that usually lead to having plenty of options and freedom to achieve the desired look in the image. However, in KeyShot you are only presented with 7 main buttons to control the functions of the software, which makes KeyShot intuitive and user-friendly.
1. Import Button
This step is fairly straight forward. I say “Fairly” because there are some settings that need to be changed before the software imports the model. That means the import process will take some trial-and-error to get it right, but once you are familiar with all the import options, the process becomes much easier. Personally, I encountered a problem while trying to import Autodesk Inventor 2014 files into KeyShot, due to 2014 version not being supported, but I am sure that Luxion will release an update to fix the issue soon. I wonder why they don’t leverage Inventor Apprentice to allow year round support for all new Inventor file formats, it installs with the free Inventor View? Luckily, there were many more ways to get the model into the software, such as exporting the scene from Inventor to a *.step or *.igs file and then importing it into KeyShot, which worked without a hiccup. Once the model is in the scene, KeyShot starts doing its work and starts real-time rendering, but worry not; the interaction with the object is not compromised. Every time the scene is moved (rotated or zoomed) the rendering starts over, giving a preview of how it would look in the final image. Performance mode can be selected for snappier response which can be quite handy when applying materials styles to different objects in rapid succession.
2. Library Button
 This is the starting point of the rendering setup workflow. The library provides access to different preset material styles, colours, sceneenvironments, backplates etc. It contains vast amounts of material appearances, which look amazing right out of the box. Some styles contain a texture, which must be adjusted to match the scale of the model, but editing the texture size is quick and easy. Applying materials to the scene has never been simpler. Just drag and drop styles directly onto different objects in scene. I expected that it would have problems with accuracy, but application is very precise, applying styles exactly where the tip of the mouse pointer is. Once you finish applying material styles, you can switch to the Colours tab which provides colour libraries. You can choose between basic, PANTONE(!) and RAL colour libraries, and apply them directly over the chosen material styles. The KeyShot library also includes a wide selection of different HDRI environments that control the scene’s lighting. Yes, that’s right, this rendering system uses IBL (Image Based Lighting), which works nicely. Should you have a need to add your own items (environments, backplates, textures, etc.), simply add the desired files to the KeyShot folder on your PC and watch them appear in the library
3. Project Button
You can edit all of the settings applied previously and browse through other various options using the Project button. There were a few things I was very excited about:
- I liked that it gave me the ability to modify the brightness and the contrast of the scene without having to re-render it.
- I just loved the option to have a shallow depth of field, which looks great in the final images.
4. Animation Button
This opens the animation window and presents the user with a few setup options. You can choose whether to move the camera and/or the model. I won’t review the animation topic for now, since this article is about rendering rather than animation.
5.Screenshot Button
The screenshot button is pretty straight forward. Click it, and it will quickly snap a screenshot of the current scene. That is it. Remember that KeyShot does real-time rendering; if you leave the window open for a while, KeyShot might produce a high quality render right in the view port.
6. Render Button
Now for the most important part – rendering. Rendering is fast, easy to set up, and can produce very high quality images. That is all one requires from a rendering system, isn’t it? All the standard settings are included, of course:
But the function that got me very excited about rendering can be found in the Quality tab. Maximum time! Choose the amount of time you give Keyshot to finish rendering and it will adjust the settings to fit within the time frame. This feature is amazing – knowing exactly how much time it will take to render an image is crucial in most situations.  The ability to choose the quality based on time is extraordinary; you can have a quick render preview in 15 minutes, while you are having your coffee, or you can leave your computer on during the night and wake up confident that you have used every last second of your sleeping time to render a high quality image
7. KeyShotVR Button
Lastly, KeyShotVR button opens a dialog for the VR option. Note that this option is not included in the standard KeyShot package. KeyShotVR helps you create an interactive, HTML5 friendly, 3D content, that could be used on websites and other applications.
Comparison:
So, how does it compare with the big guys in the market, with built-in rendering systems, you ask? Well, I have tried a couple of renderers in my lifetime, such as Inventor’s “Realistic View”, Inventor’s Studio Environment, Mental Ray, Brazil, VRay, Blender, Autodesk Showcase and some others on the market. It is hard to compare all these packages, because they were developed with different tasks in mind.
I thought I should do a small comparison test. It is not the most accurate test in the world, but it might help you to understand what all the fuss is about.
I created this suspension assembly in Autodesk Inventor, exported it to KeyShot, applied all the materials and rendered it. Then, I imported the same model into Autodesk 3ds Max 2014 and made an image using Mental Ray. Finally I rendered the assembly in Autodesk Inventor using Autodesk Inventor’s “Realistic view with Ray Tracing”. The goal was to make a relatively photo-realistic image of the suspension as quickly as possible.
Image sizes were set to 1920 x 1000 px, be sure to click on the images below to view them full size in all their glory.
Autodesk 3ds Max 2014 – Mental Ray
It took me 3 hours and 45 minutes to produce an image in Autodesk 3ds Max 2014 using Mental Ray. That included importing the model, creating material styles, applying them to different parts, creating a scene and rendering the image. Here is the result:
Autodesk Inventor – Realistic view with Ray Tracing
It took 30 minutes to apply the materials and create a virtual studio, and 4 hours to render the image. This does not include countless hours spent on creating material styles, which took a lot of trial and error to get right. Result:
Luxion KeyShot 4
It took 20 minutes to set up the scene and apply the preset material styles, and exactly 30 minutes to render the image. Result:
This most certainly concludes that KeyShot handled the task very well in the shortest amount of time. Clearly it’s a real time saver. I must also mention that I have only been using KeyShot for four days, which gives you an idea of how small the learning curve is.
Personally, KeyShot 4 fulfilled all my expectations and now I understand why people keep praising this software. I think it is brilliant. You can download a (watermarked) trial and try it yourself. It is the only way to experience its power.
Download the KeyShot 4 trial here!
– Gus
[subscribe2]


